Move to Reject
As you iterate through each of the steps needed to authenticate email from your domains, you can use the tools and reports in Agari DMARC Protection to organize and track your progress:
Using these tools and reports, hopefully you can become confident enough with your authentication that you can enforce a stricter policy for your domains.
Feel free to schedule a review with Agari Customer Support if you need help interpreting the data prior to moving to a Reject policy.
Agari recommends that you:
- Obtain sign-off from all business owners.
- Move DMARC records for your selected domains to Reject.
Prior to enabling an enforcement policy, ensure that you have communicated with all internal business owners for a domain. As the reports mentioned above can show, you should be able to anticipate any deliverability problems from a single domain, sender, ISP receiver, etc.
Work with the list of contacts you made in Track All Senders.
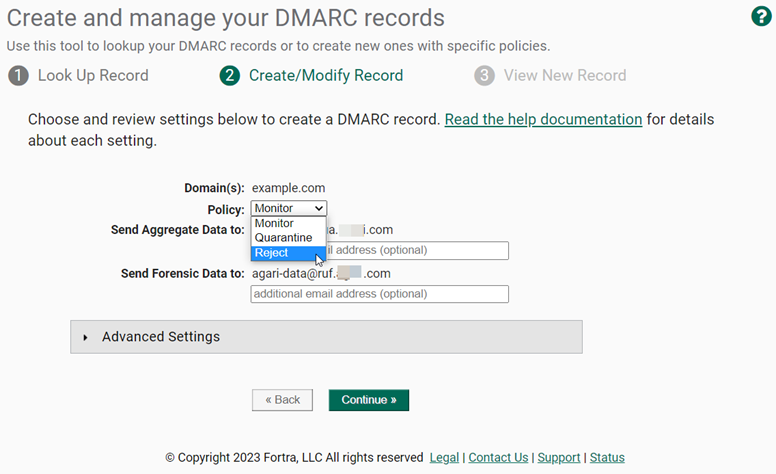
The process for updating and publishing a policy is the same as the one you used in Create a DMARC Record With DMARC Builder. However, now that you have gained visibility you can set the policy to be Reject:

The modified policy will contain the p=Reject notation:

Congratulations!
Using this guide, you have successfully managed the steps to implement an enforcement (p=Reject) policy for a domain or set of domains in your organization.
Using DMARC, you can be confident that you have protected your brand from spoofing and instilled trust in your customers.