Create an Auto-Response Action
TIP: Only users with the Organization Administrator role can create auto-response actions.
Creating a custom auto-response action allows you to:
- select which Phishing Response events will trigger auto-response actions to send emails when when a report is opened, closed, or updated.
- designate conditions to be met before an auto-response is sent.
- select from a list of variables and click to insert them into fields in your customized action.
To create an auto-response action, follow these steps:
- Go to Settings > Manage. The Auto-Response Actions panel opens.

-
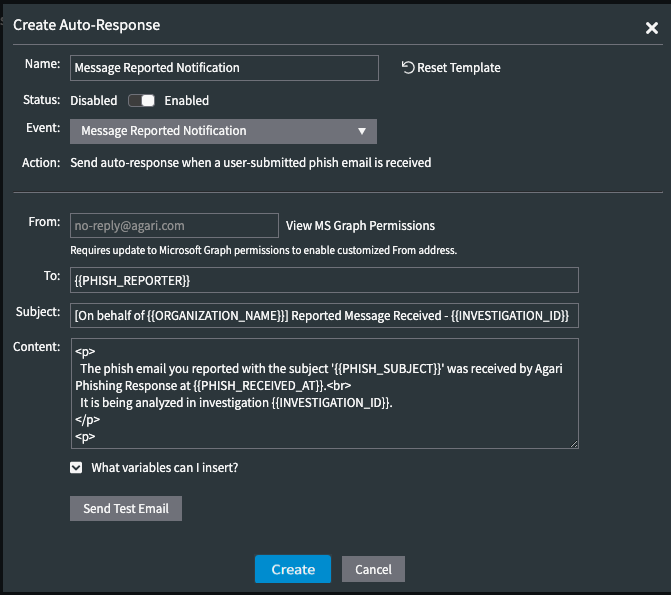
Click the Create Auto-Response button. The Create Auto-Response screen opens:

- In the Name field enter a name for your auto-response or use the default name.
- Enabled status is set by default. If now or any time in the future you want to disable the response, toggle the switch to Disabled. When disabled, the response is not sent but still exists and can be enabled as needed.
- Use the drop-down Event menu to select the event that will trigger your auto-response.Each of the event types in the menu that you select automatically fills the To, Subject, and Content fields below with information appropriate for that type of event, which you can modify to customize the response.
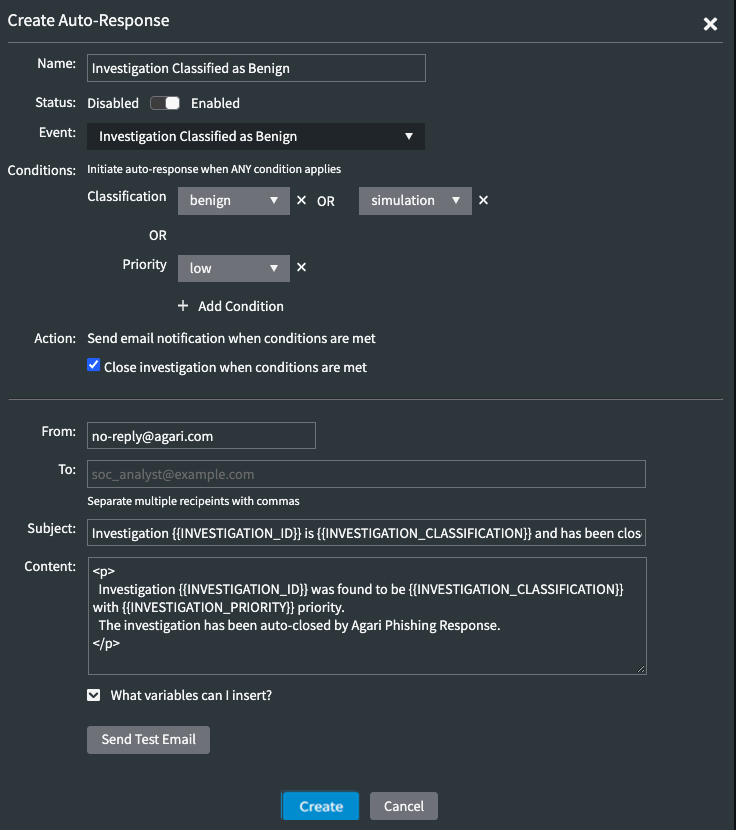
For example, selecting Investigation Classified as Benign adds Conditions options as shown:
- If Conditions options are visible, use the menus to select one or more Classification and/or Priority settings, to indicate that events must meet these conditions in order for a response to be sent. These choices will in turn determine whether options such as Close investigations when conditions are met appear.
- In the From field enter an email address. An example address is shown. but you must enter an address. If you would like to configure the From field to use an email address from your organization, you can enable MS Graph permissions to allow Agari to send mail as users in your organization using the following steps. You only need to do this once.
- Click the View MS Graph Permissions button.
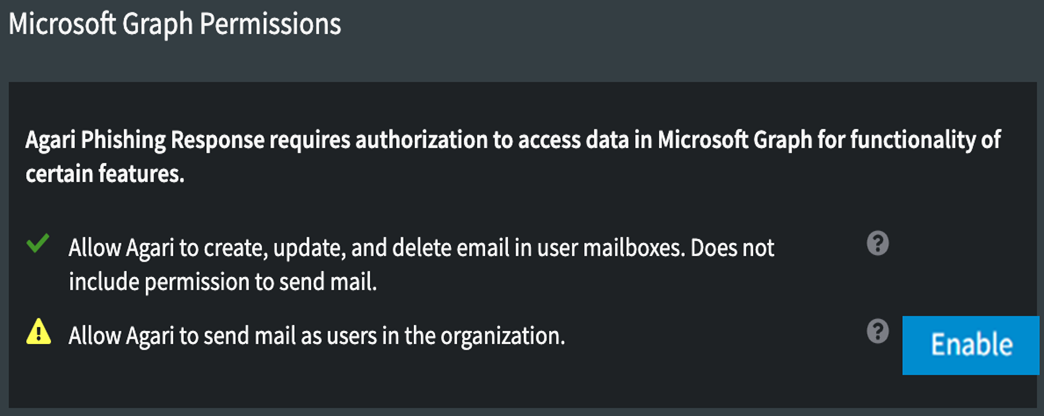
- In the Organizations screen that opens, scroll down to find Microsoft Graph Permissions.
- Click the Enable button to the right of Allow Agari to send mail as users in the organization. This takes you to a page where you can sign in with your Microsoft Office 365 account, which must have appropriate administrative permissions. After logging in and granting permissions, you are redirected back to the Phishing Response screen, where a green check mark indicates that permission is enabled.

- The To field is populated according to which event is selected. You can use a different variable from the Variables menu below, or enter an email address manually.
- The Subject and Content fields are filled automatically according to the event type that you selected. You can customize these by using the variables from the Variables menu below, and/or by entering text.
- Click the arrow next to What variables can I insert? to see a list of allowed variables. See Auto-Response Action Settings for explanations of the variables.
- To use a variable, hover on a variable in the list and click anywhere on the highlighted selection to copy it to your clipboard, then paste the variable into the fields above as needed.
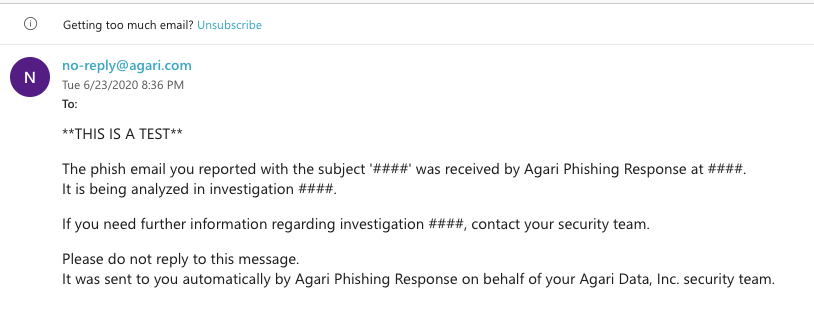
- To test your auto-response, you can enter your email address in the To field and click Send Test Email to send an email notification to your address. In a test email such as the one shown below, variables such as Investigation ID appear simply as #### since there is no linked data without an actual investigation.

- Click Create to create your auto-response or Cancel to exit. You can also select Reset Template at the top of the screen to return to the default settings.