Create a Test Policy
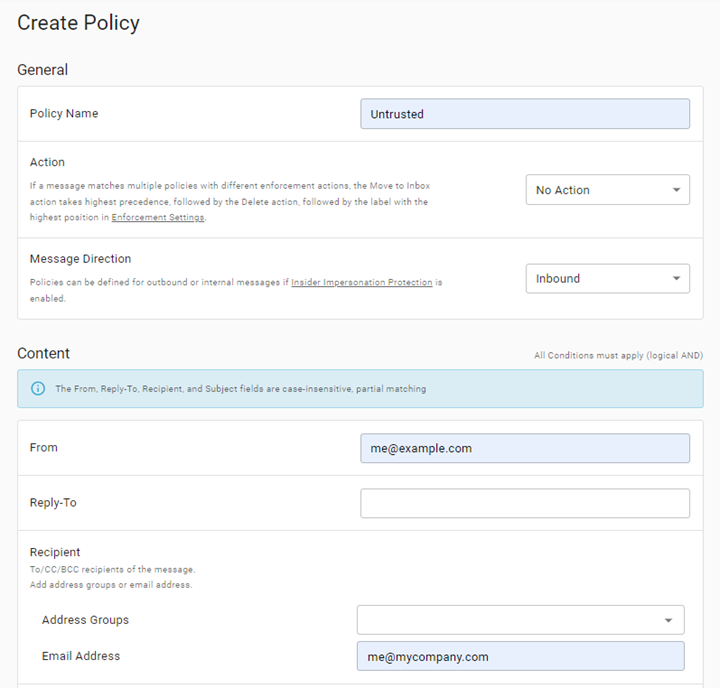
Creating a basic policy is simple: you need to enter only three pieces of information.
- Go to Manage > Policies.
- Click CREATE POLICY.
- Enter the following information:
- Policy Name: untrusted
- From: Your personal email address
- Recipient: Your company email address

- Click SUBMIT.
- Send a message from your personal account to your company address.
At this point, your Policy is finished. Note that we did not specify an action. The default action for all matched policies is to log the message in the Policy Log.
And that's it. You have successfully created a policy to match incoming mail.
Matching incoming messages based on conditions is a basic building block for creating a policy. From here you can add more detail and complexity, matching subjects or specific domains or IP addresses. You can create address groups for matching groups of senders or recipients. (See Address Groups for more information.) You can specify a range of scoring options.
Next, you will want to specify actions to take on matched messages.
Specifying Actions
Now that you are comfortable creating policies to match messages, it's time to specify what will happen when those matches occur. In addition to the default logging, you can also specify two other actions: Notify and Enforce (enforcement customers only). Think of the actions as part of a spectrum: logging is the action with the lowest impact, and followed by a notify action, and then enforcement at the highest end. So while you are coming up to speed on policies, first try logging only, then notify just the Admin, then notify the message recipients, and then consider enforcing.
Enforcement customers: test your policies before enabling enforcement to ensure they are not too broad (overly broad policies can lead to false positives).